5 Tips To Dominate Off-Road U-Turns & Figure 8s on a Big ADV Motorcycle
Anyone who has ridden an adventure motorcycle off-road knows that mastering the u-turn and figure 8 can be tricky. In this blog post, we will discuss 5 tips to help you dominate these maneuvers and have more fun on your next ride!
Off-road u-turns and figure-8s on big ADV motorcycles can be learned, improved, and put into use with these tips:
- Proper vision and line selection
- Keep momentum with appropriate clutch modulation
- Allow the bike to lean into the turns
- Understand when to use the brakes
- Know how to recover and if there is a mistake
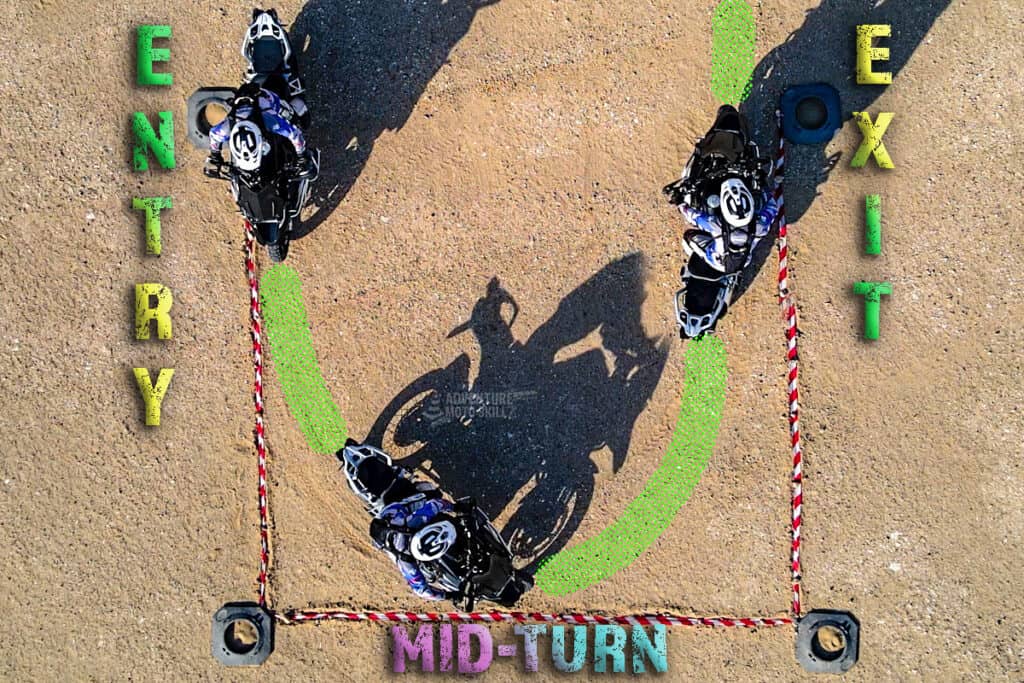
I like to break down the u-turn into 3 stages: initial entry, mid-turn, and exit. Each stage has its own requirements that contribute to a successful u-turn. Let’s look at these 5 tips and how they evolve within each stage; then we look at how to perform back-to-back u-turns for a complete figure-8 pattern.
This post may contain Affiliate Links. Please see our Privacy & Disclosure Policy for more details.
There are lots of “if, then” scenarios when performing off-road u-turns. “If” the u-turn is on a slight uphill or downhill or over wet roots, “then” you will need to fine tune your technique. So for simplicity, this post will provide tips for a flat surface u-turn without any obstacles or hazards. As you gain experience, you will adapt your technique to match each unique off-road terrain presentation.

Top-quality gear for your next adventure
Used and recommended by ADVMotoSkillZ
Tip 1
Vision & Line Selection for off-road u-turns and figure 8s
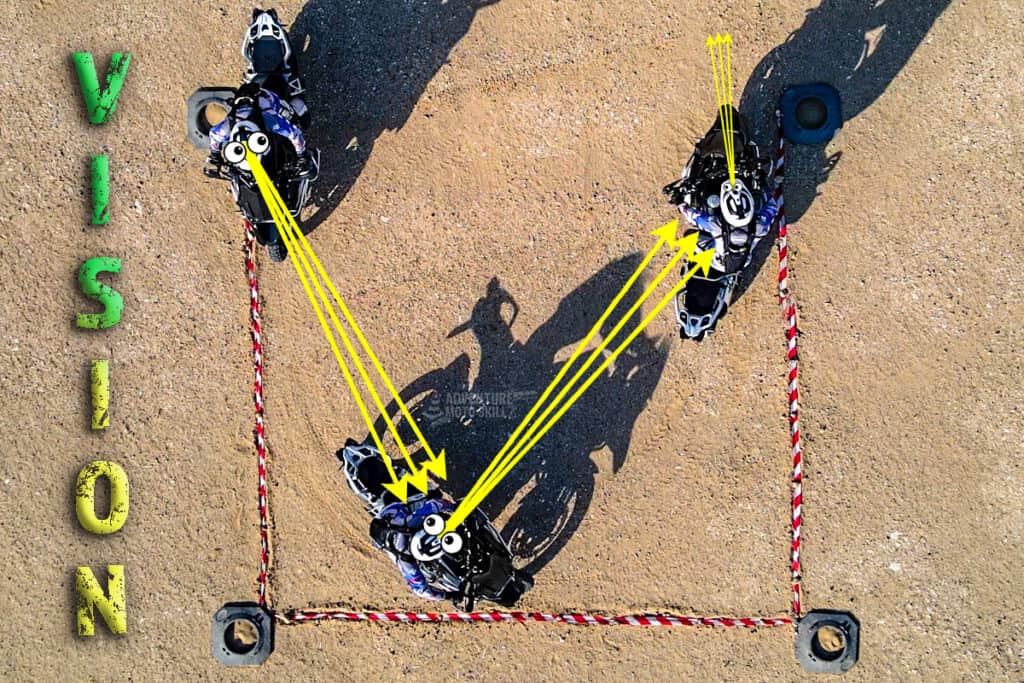
U-turn Initial Entry – As you enter into the U-turn, visually scan the area approximately 1-2 meters/yards in front of the front tire. Looks for holes, rocks, or roots that you will want to avoid or prepare for. Plan your line by finding the mid-point of the u-turn and keeping your vision focused on this turning point as you make the initial entry.
U-Turn Mid-Turn – When you transition from initial entry to the mid-point of the u-turn, rotate your head fully in the direction of the turn and bring your vision to the exit point of the u-turn. Be actively scanning the line of the turn to identify hazards, obstacles, or even riding partners.
U-Turn Exit – With the mid-point of the turn complete, bring your gaze up and as far into the horizon as you can see. Select your line and exit out.
Tip 2
Momentum with a big ADV motorcycle for off-road u-turns and figure 8s
U-turn Initial Entry – A slow and controlled u-turn will serve you well in almost any riding scenario. Start your u-turn by entering in first gear and traveling at 10-12kph/6-8mph. Aim to keep the bike at approximately 1200-1500 rpm.
PRO TIP: Have 1 or 2 fingers on the clutch lever and bring it just to the point of engagement as you enter the u-turn. This will set you up for successful feathering in mid-turn and exit.
U-Turn Mid-Turn – Speed at the mid-point of a u-turn will be dictated by your lean angle and body position.
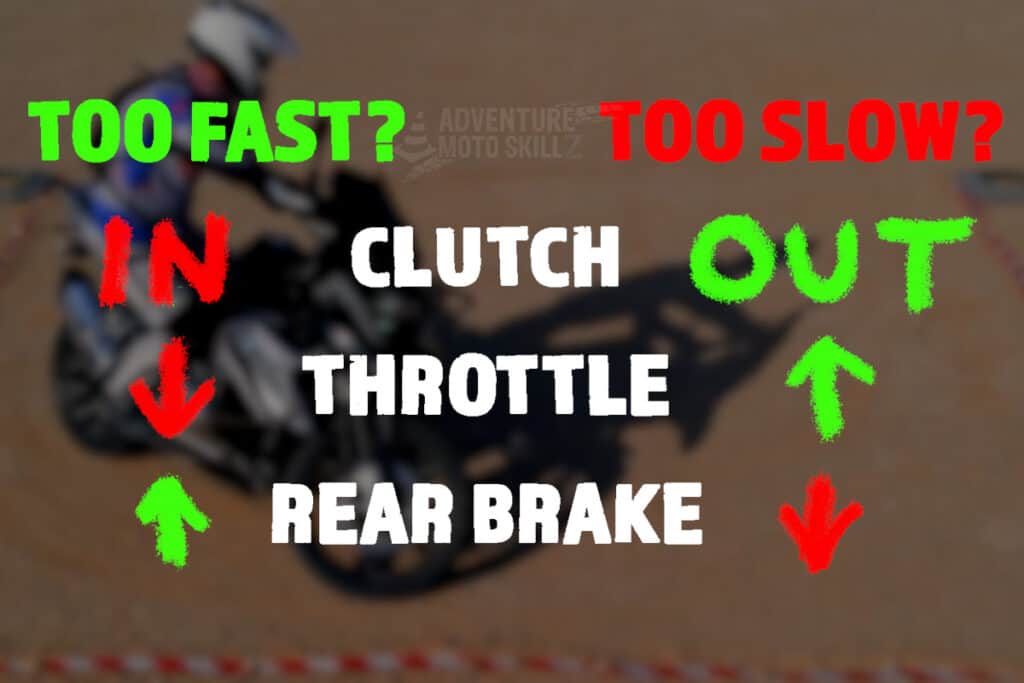
If you feel like the bike is moving too quickly, your options are to feather the clutch lever inward to reduce power to the rear wheel or increase rear brake pressure (ever so slightly). Often times it is a combination of both subject to the surface conditions and your lean angle.
If the bike is lacking momentum as you enter the mid-turn, then look to feather out the clutch to increase power to the rear wheel, gently roll on the throttle, and/or release any active braking.
PRO TIP: Less momentum will increase the bike’s lean angle, while more momentum will stand the bike up (or reduce the lean angle)
U-Turn Exit – As you successfully pass the mid-turn and travel to the exit point, feather out the clutch, add throttle, and remove any braking. By increasing momentum at the exit, the bike will stand up and you can prepare for the next leg of your journey.
Tip 3
Body position & lean angle on your ADV bike for off-road u-turns and figure 8s
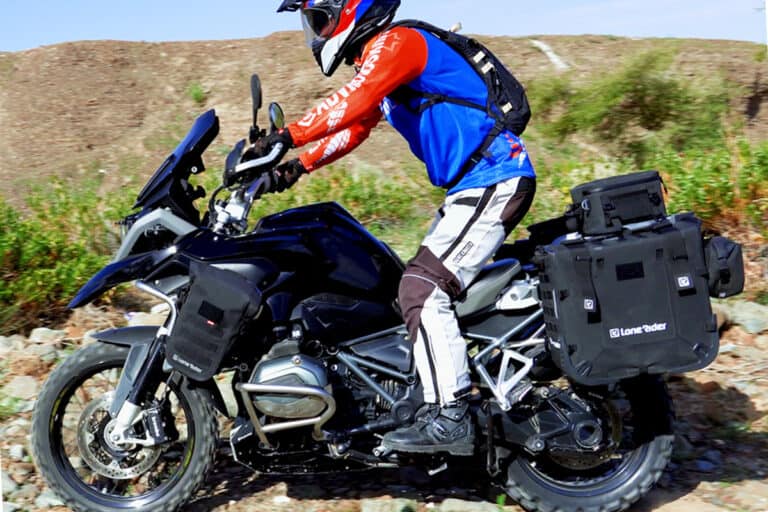
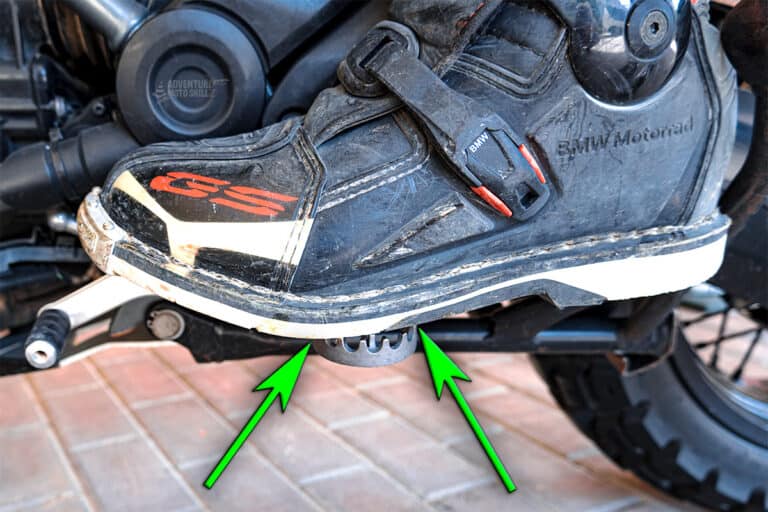
U-turn Initial Entry – Enter a standing u-turn with your feet touching the pegs between mid-arch and the ball of the foot. Keep centered over the bike with a gentle squeeze of the bike with the knees and lower legs. This posture will keep the bike balanced and prepare you for the upcoming lean of the bike.
Enter a seated u-turn with the same foot position as above. Apply a gentle squeeze of the tank or narrow portion of the seat to help stabilize you during mid-turn when you will need to shift your weight.
Innovative Motorcycle Tool Sets – Compact & Reliable
Used and recommended by ADVMotoSkillZ
U-Turn Mid-Turn – At the point of mid-turn in both standing and seated u-turns, you will be transitioning your vision to the exit point and turning the handlebars (sometimes into a full lock turn).
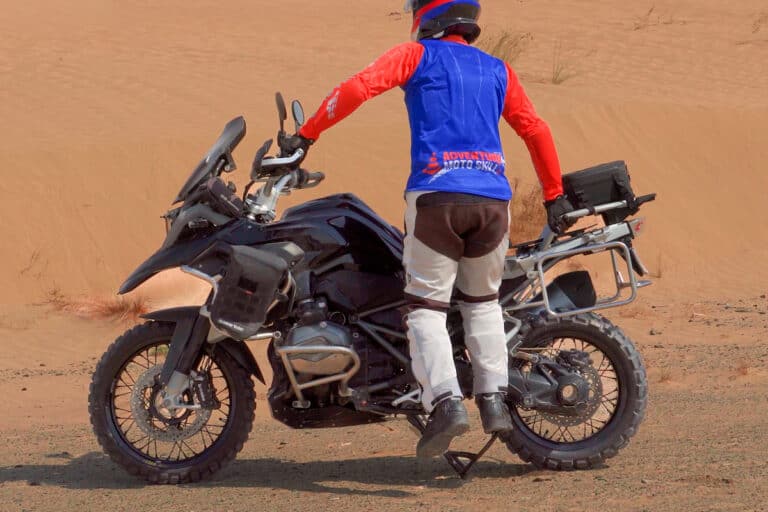
Your body weight will shift to the outside peg as the bike leans into the turn. If you are standing, this is a lateral shift of your hips to the outside of the turn to put pressure on the outside foot peg for counterbalancing the bike. If you are seated, slide your bottom toward the outside of the turn so that one-half is off of the seat for counterbalancing.
As you shift your body weight your shoulders will need to rotate so your chest is facing the exit point. Try to keep your shoulders and chest square to the handlebars through this rotation. Your inside elbow will become fully extended while your outside arm should be held out wide at approximately a 90-degree angle (don’t let your shoulder shrug up to your ear).
U-Turn Exit – As the bike completes the u-turn, all lean angle will be removed as the bike returns to neutral.
Watch here:
Tip 4
Front or Rear Brake during off-road u-turns
U-turn Initial Entry – The advantage of slow and controlled u-turns is that (with practice) you can safely apply the rear brake without upsetting the bike’s balance. Without ample experience, using the front brake can cause the front suspension to dip down leading to traction overload of the front tire. For this reason, I recommend using the rear brake over the front for most of my students.
U-Turn Mid-Turn – The bike will be leaning during the mid-point of the u-turn, therefore clutch or throttle modulation is a better choice to reduce speed. However, if you are in control of your turn, a light tap onto the rear brake pedal should slow you down without a problem. This will need to be practiced to get the feel of it.
U-Turn Exit – If an emergency occurs during your u-turn exit requiring you to brake, smoothly apply the rear and front brake in combination with clutch and throttle modulation.
Tip 5
How to recover from a mistake on your ADV bike during off-road u-turns or figure 8s
U-turn Initial Entry – Most entry mistakes are related to momentum and/or trying to correct the wrong entry momentum. Proper balance of clutch, throttle & brake reviewed in tip 2 is key here. If you feel your speed is too great to attempt the u-turn, then it is best to perform an emergency stop and chose a different turnaround method.
U-Turn Mid-Turn – A bike that starts to lean too much can typically be stood up with a small blip of throttle or release of the clutch. Either of these inputs should be slow and steady to avoid upsetting the bike’s balance.
A bike that does not have enough lean angle to make the turn can be corrected by slowing momentum and increasing counterbalance posture.
PRO TIP: If the bike is falling and has reached the point of no return, simply allow it to safely drop. Fighting to keep a 250kg/550lb bike upright when it has already decided to fall will only lead to injury and frustration. Step your inside leg out wide as the bike drops underneath you, ensuring you are clear of the falling bike, then turn off the engine, lift the bike and walk it out of the area.
U-Turn Exit – If you open up the throttle a bit too early out of the turn, the rear wheel may skid out or “fish tale” as you exit. Correct this by either rolling off the throttle or feathering the clutch.
How to transition a u-turn into a figure 8
Vision – Keep your head on a swivel during figure-8s! Vision will follow the same tips for u-turn entry, however as you reach the mid-turn point, your vision will move to the transition point of the figure-8, instead of the exit point in the u-turn. As you approach that changeover, your vision should scan ahead to the next turning point of the other half of the 8.
Momentum – Constant balance of clutch, throttle, and brake is an earmark of figure 8 riding. You will remain within the friction zone throughout the 8 with supplemental blips and braking as needed.
Body Position – During a figure 8, you and the bike are constantly transitioning from side to side, always counterbalancing to the outside of the turn and allowing the bike to lean into the turn. Both you and the bike will be in a neutral and upright posture for a brief moment only at the point of transition from one half of the 8 to the other.
Braking – During figure 8, the clutch will be modulating the majority of your power inputs. If brake is needed, practice using the rear brake first and then only try the front once you improve your figure 8 skills.
Recovery – Don’t be frustrated if your early figure 8 practices feature multiple drops and burnouts. Balance and power modulation must be mastered before tackling figure 8s.
So get out there and give these tips a try today!

About the Author
Coach Mike is a Certified Off-Road Motorcycle Instructor & founder of ADVMotoSkillZ.
Riding tips from ADVMotoSkillZ reach thousands of international riders daily through social & blogs.
Click here to learn more about Mike’s motorcycle evolution from a Harley road rider to finding his true passion for off-road riding on a BMW 1200 GS.
If you would like to send Mike a quick message or invite him to provide training at your local facility, then visit the contact page here.