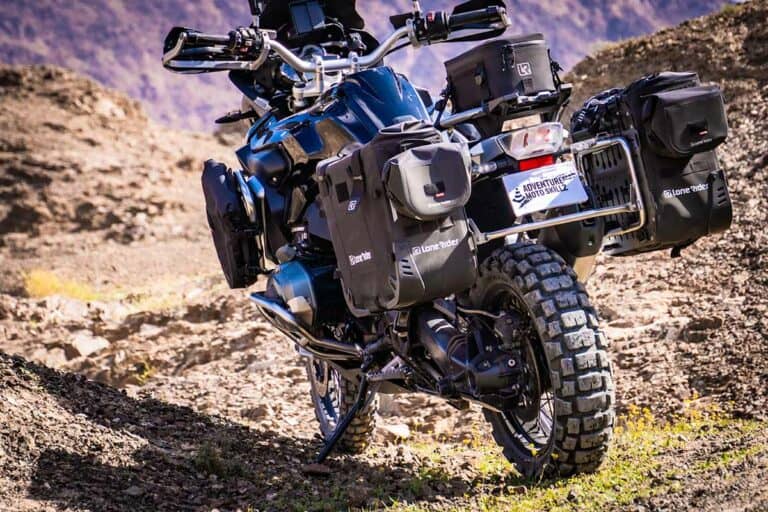
Foot Position for ADV Motorcycles Off-Road: A Detailed Guide
There is no singular “right” way to position your feet on an adventure motorcycle when riding off-road. However, there is a “range” of foot placement options available to match differing riding scenarios. Bike setup, foot size, peg choice, and terrain are just a few of the factors that influence the optimal foot position for an individual rider. In this post, we will explore common foot positioning options and evaluate each for comfort and efficiency.
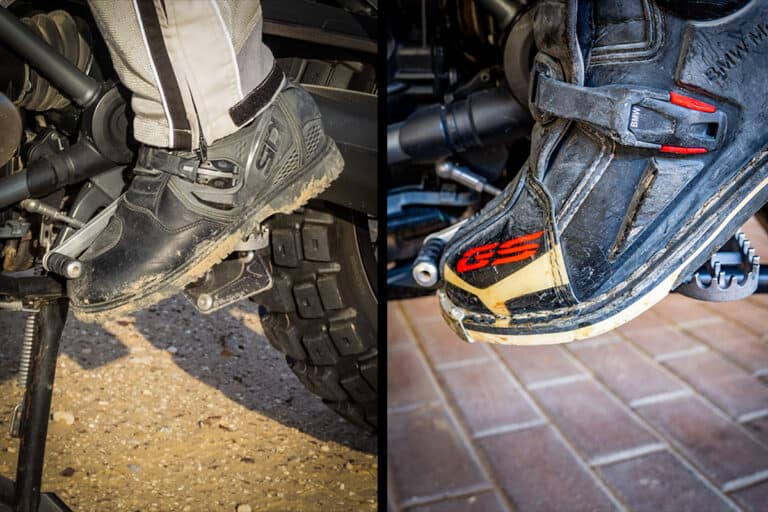
The most efficient way to position your foot on the peg of an adventure motorcycle is to contact the peg at the base of the ball of the foot. This allows foot position to be dynamic throughout the ride adjusting forward and back to compensate for terrain, cornering, obstacles, and rider preference.
This post may contain Affiliate Links. Please see our Privacy & Disclosure Policy for more details.
A widely held misconception is that there is only one position for your feet on the pegs. Riding styles that keep the tires on the ground at all times may be able to keep a more static foot position. But if you enjoy rocky and bumpy off-road terrain with the occasional jump over a log or obstacle, then this thinking will limit your growth as an off-road rider. Adventure motorcycling demands fluidity in body posture and this all begins at the foundation with the feet. Let’s have a closer look at how we can use our feet to improve our adventure.
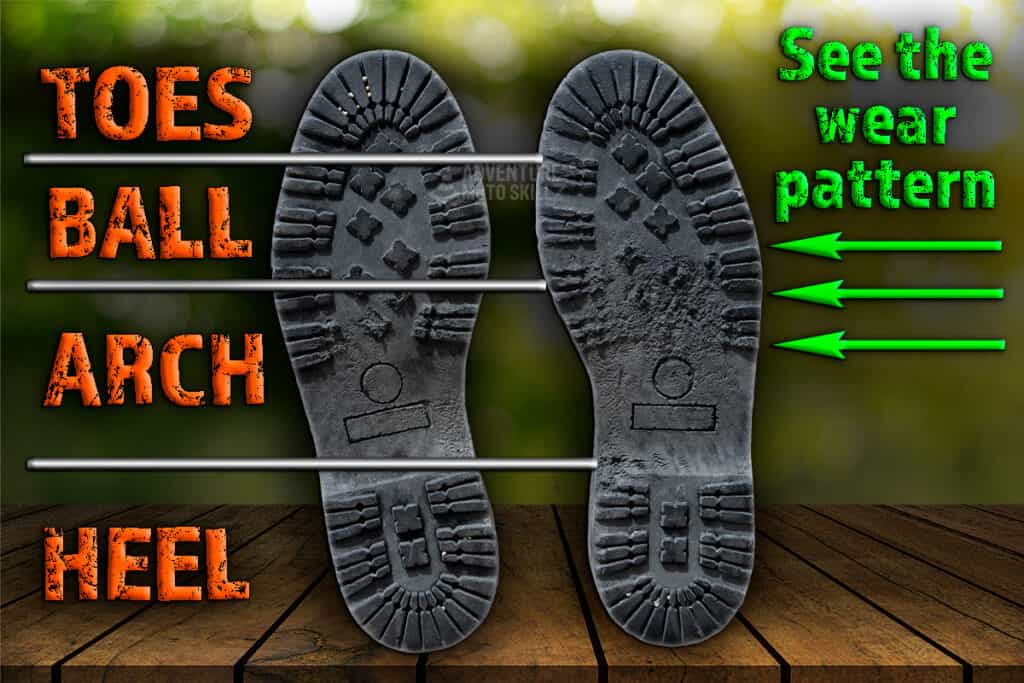
How to use each area of the foot/boot during ADV riding
Toes
- Our toes and the toe box of the boot are responsible for operating the shifting lever and the rear brake.
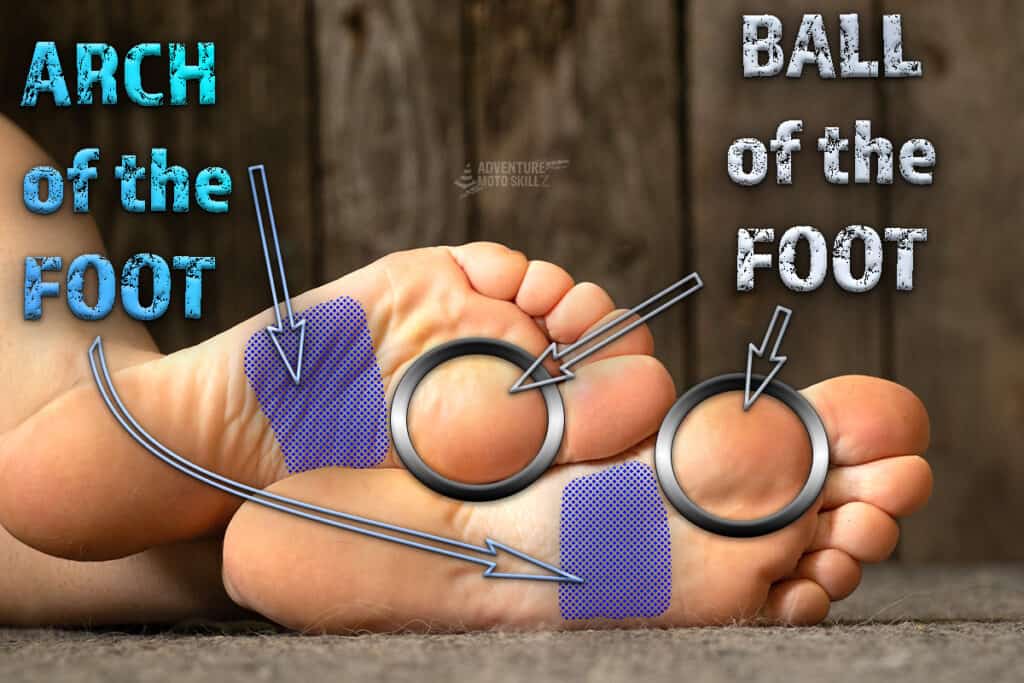
Ball
- The ball of the foot refers to the location at the base of the big toe at the knuckle.
- This is the area of the foot that’s most talked about in articles related to foot position on the peg.
- Making contact with the peg at the ball of the foot during road riding and leveled terrain off-road is comfortable and efficient.
- This foot position allows for maximum ankle flexibility allowing the heel to drop down and limiting accidental engagement of controls.
Arch
- The arch of the foot is the central area between the ball of the foot and the heel that may be arched or flat depending on our own unique anatomy.
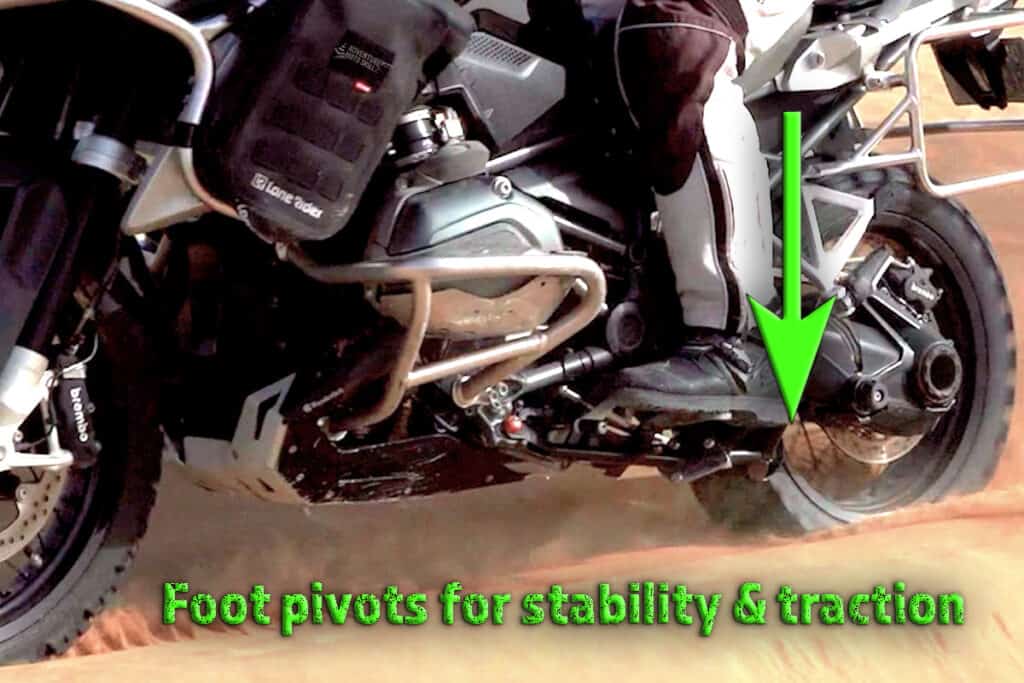
- Placing the foot on the peg at the upper edge of the arch (just below the ball) can actually provide increased control in technical off-road scenarios, like steep descents and wheelies, while also providing a stable foundation for the knees, hips, and upper body to safely adjust positions which helps in keeping help in good balance.
Heel
- The heel of the foot is at the very back and should rarely make contact with the pegs.
- Many boots offer a prominent heel that can act as a hook onto the back portion of the peg, but this should never be a default riding posture.
- Hooking the heel can help prevent your foot from slipping forward off the peg during sudden and unexpected changes in momentum.
Ankle
- The ankle joint deserves a mention here as the hinge sitting directly above the foot.
- Foot on peg placement creates or removes opportunities for the ankle to flex or extend.
- The inside of the ankle can be used to squeeze the bike to create added stability during bumpy or technical trails.
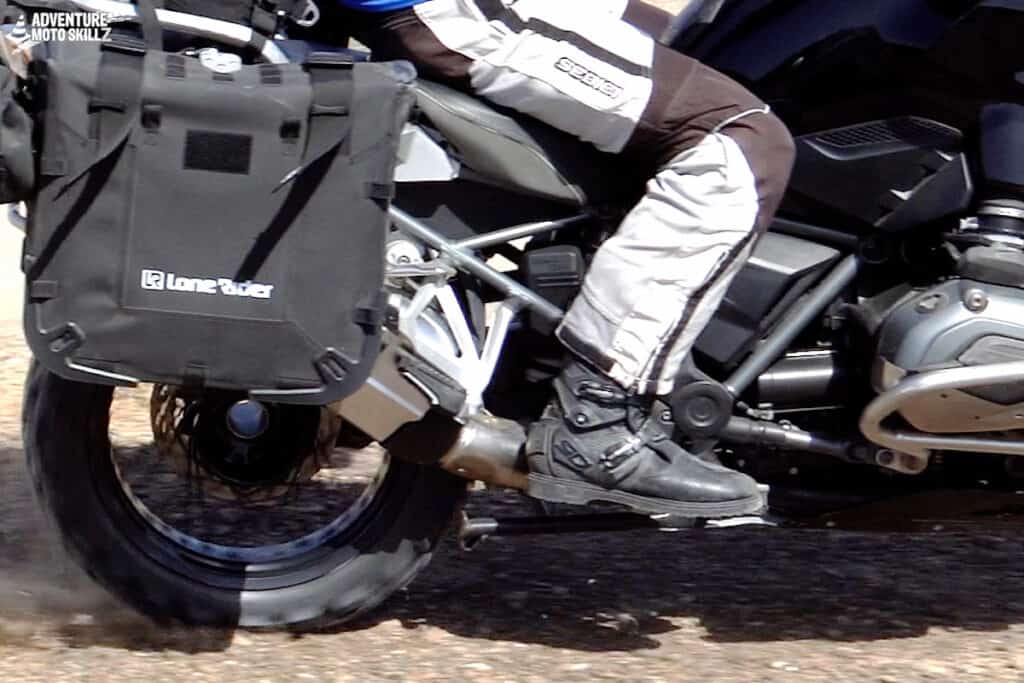
Foot placement during seated off-road riding
Smooth hardpacked gravel and dirt roads provide a comfortable off-road surface that allows for seated riding. In these circumstances, we can carry over on-road habits and ride with our feet on the pegs in a comfortable position that provides easy access to tap the shifting lever or rear brake as needed. For many riders, this sweet spot will be the ball of the foot. However, foot size and peg style choice matter when making this decision, so don’t limit yourself.
Riders with smaller feet may be more comfortable sliding the left foot slightly forward to reduce the distance to the shift lever when needed for rapid upshifting or downshifting. This position is more efficient than moving the foot back and forth from shifter to peg during these short sections of rapid shifting.
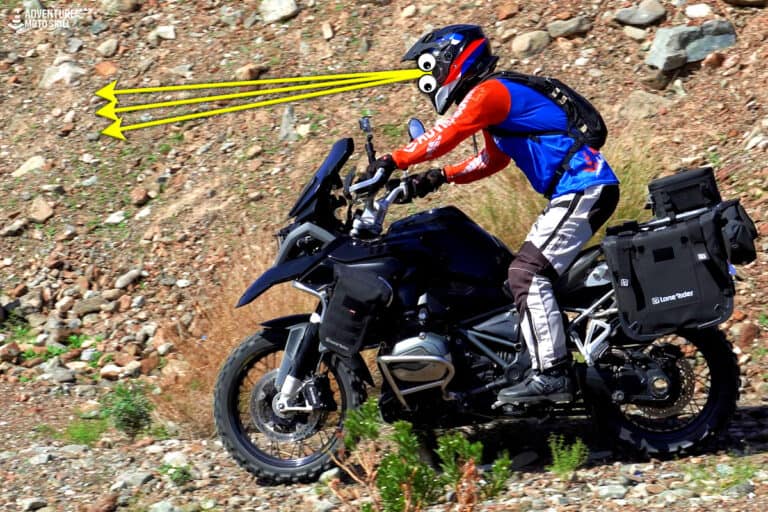
Feet should always remain close to the bike with the inner ankle snug to the frame. A faulty toe-out position during off-road riding places you at risk of having a rock or tree branch catch your foot and knock it off the peg and limits your ability to have a firm grasp of the bike with your lower legs. This becomes even more important when standing but still remains best-practice when seated as well.
If you’re riding seated during a bumpy stretch of trail, try positioning your foot with the front part of your arch on the peg to provide greater stability and allow you to weight the pegs more efficiently. This foot posture will also set you up for success if you need to quickly stand up on the pegs to help stabilize the bike. Experiment with this and see what works best for you.
Innovative Motorcycle Tool Sets – Compact & Reliable
Used and recommended by ADVMotoSkillZ
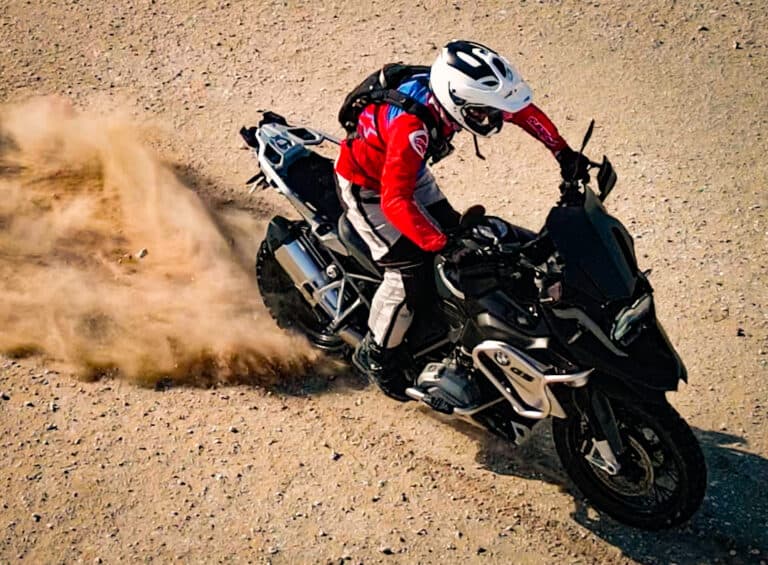
Foot placement during standing off-road riding
Standing when riding off-road is the time when foot position becomes much more dynamic. There is no single best position for the foot to remain in because the terrain and trails are constantly changing. Instead, choose an anchor point for your foot that allows for the greatest range of movement and flexibility.
The style of peg on your bike will also influence this positioning. Stock, adventure, enduro, and pivot pegs all have different lengths, widths, and features that will pair differently with your boot. The wider the peg and bigger the foot, the more likely that being on the ball of the foot will be comfortable and effective versus someone with narrow pegs and smaller feet.
Positioning the foot on the peg at the base of the ball or the front portion of the arch are the optimal anchor points for most riders.
When the terrain you are riding becomes more challenging and when surface conditions are constantly changing, varying your foot position on the pegs can help the bike to regain traction and aid in stabilizing the bike. Willingness to make small adjustments in your foot position will help to absorb the bumps and properly transition your body weight.
Dynamic and efficient riding requires these small adjustments to be made on the fly so anchoring the foot on the peg from the base of the ball/front part of the arch will create the options needed when riding rough off-road terrain. Your ability to keep your legs in close contact with the bike will be dictated by your foot placement.
Watch this video for an example:
Pros & Cons of Ball of the Foot Peg Placement
When the ball of the foot is on the peg there is less likelihood of accidentally tapping the shifter or dragging the rear brake. Additionally, this position allows for maximum ankle mobility, which is very beneficial in standing riding posture because you can easily move and absorb the shock of the terrain. During straightaways or non-technical sections of a ride, this position also offers a great opportunity to allow your foot to rest and recover from the more challenging sections.
However, when tackling steep uphill climbs, jumps over obstacles, and wheelies, the ball of the foot placement may not offer you the strong foundation you need. Riders who overcommit to keeping the ball of the foot on the peg, tend to struggle with balance and maintaining traction when it’s time to ride technical routes.
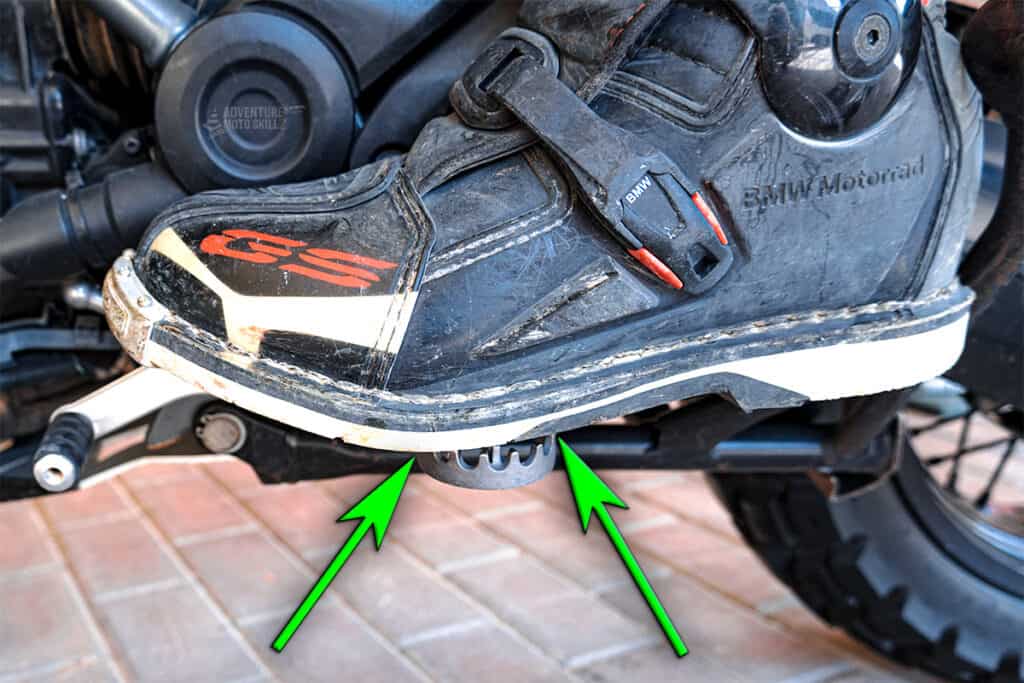
Pros & Cons of Arch of the Foot Peg Placement
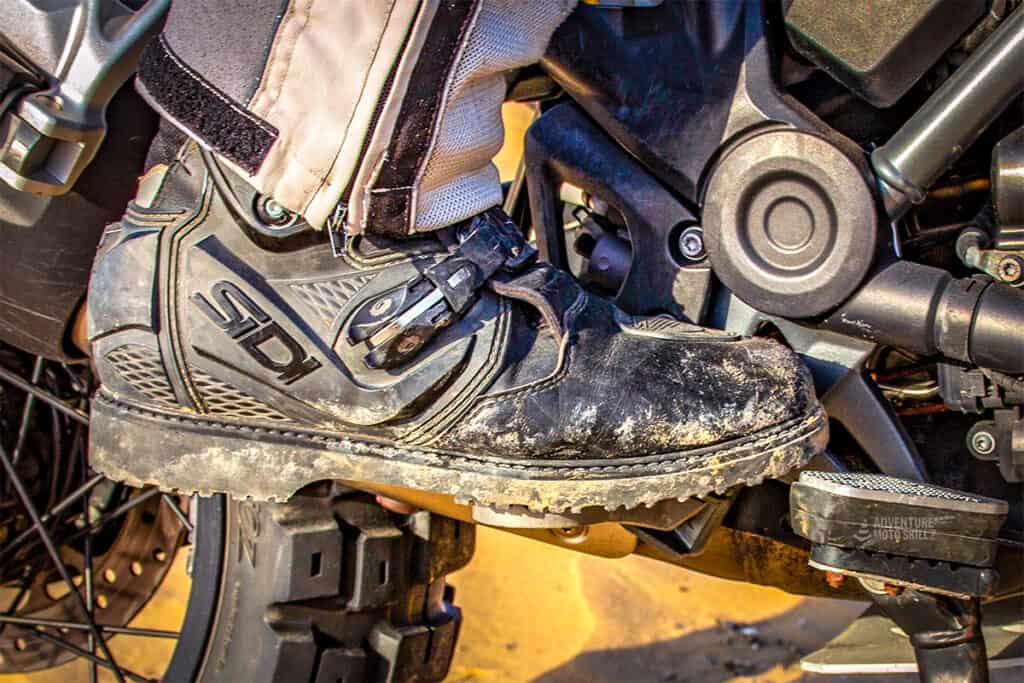
The area from the front to mid portion of the arch tends to be the sweet spot for most standing off-road riders during the gnarly bits. This foot-peg placement can be used during sections of off-road riding where you encounter large rocks or riding over ledges that cause the bike’s suspension to really bounce and rebound. This front arch position allows for the feet to be firmly planted on the pegs so that they are less likely to inadvertently slip off.
The front to mid-arch position also centers your entire body weight over the peg creating that solid foundation needed to move your body front to back and left to right as needed. This reduces strain on the calf muscles so you get to keep riding longer.
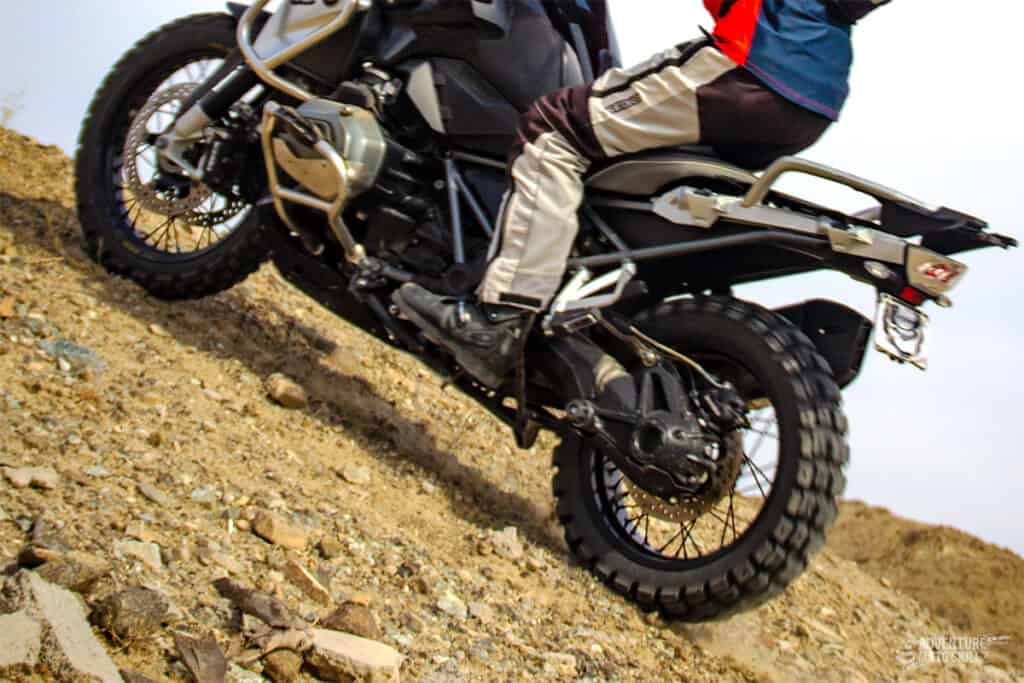
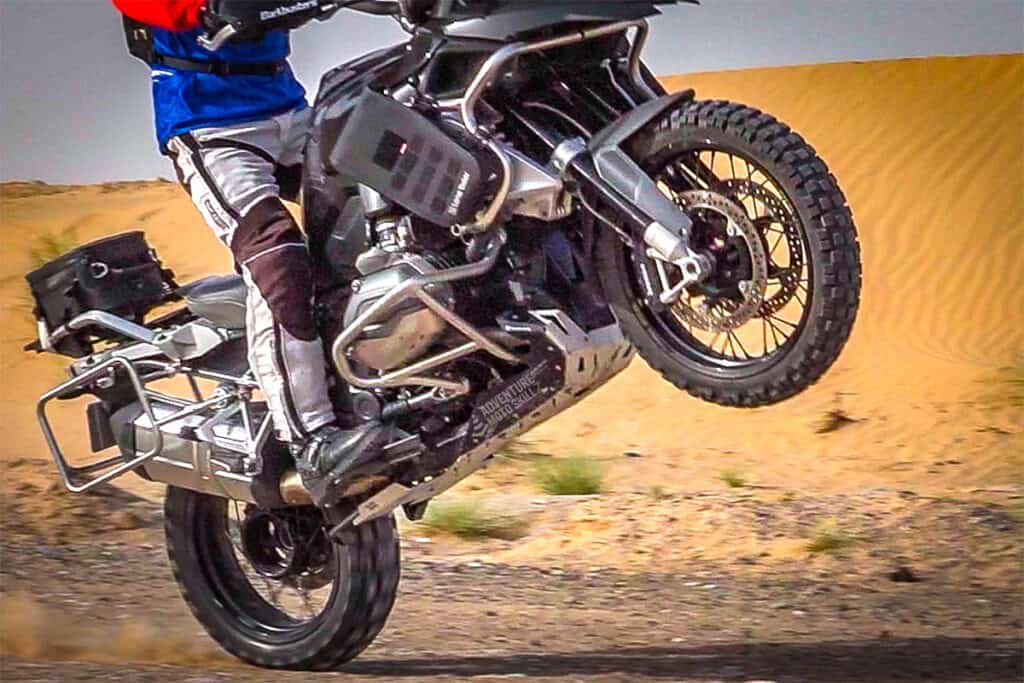
Mid-arch or center foot position on the peg is used during more technical sections of off-road riding when the bike’s suspension will be undergoing hard compression and
rebounding or when you need to lift that front wheel to cross an obstacle. Large rocks, loose sand, and water crossings are just a few times when this position will provide you added stability and control of the bike.
One of the first things you’ll notice straight away when shifting the foot forward to the center foot position is that you lose some ankle flexibility; however, it creates a strong foundation with the ability to immediately access the controls so it’s a fair trade-off. Technical sections requiring quick braking or frequent downshifting are best tackled from this foot position.
If you take a look at the top trials and hard enduro riders, you will see them frequently riding with their feet in the mid-arch position. As ADV riders, once we get past those gnarly technical bits, it’s good to get the feet back to the ball of the foot area for overall adaptability to the terrain.
It is worth cautioning that the mid-arch foot position may create an opportunity for accidental tapping of the brake or shifter. You will need to practice these foot positions to find your ideal position. The further forward the foot slides, the less ankle flexibility will be available and the more likely an inadvertent toe-out position will occur as well (this is a natural reaction to avoid tapping controls). Toe-out position should be avoided off-road for optimal safety.
Special note: Riders with pre-existing knee injuries may find it easier during sharp turns to allow the outside foot to toe in and the inside foot to toe out briefly to reduce stress on the knee joints. This foot positioning should be practiced during training sessions to find the most comfortable way to perform it for you. As mentioned earlier, always be cautious with any toe-out position when off-road, especially on tight singletrack to avoid getting your foot knocked off the peg.

Top-quality gear for your next adventure
Used and recommended by ADVMotoSkillZ
Different off-road terrain and how each influences foot position
Firm-packed gravel and well-maintained dirt roads allow for ball of the foot placement on the peg for comfort and ease. If these roads have sections of potholes or loose rocks, then a slight forward transition of the foot to the base of the ball will give added stability and support for the rest of your body.
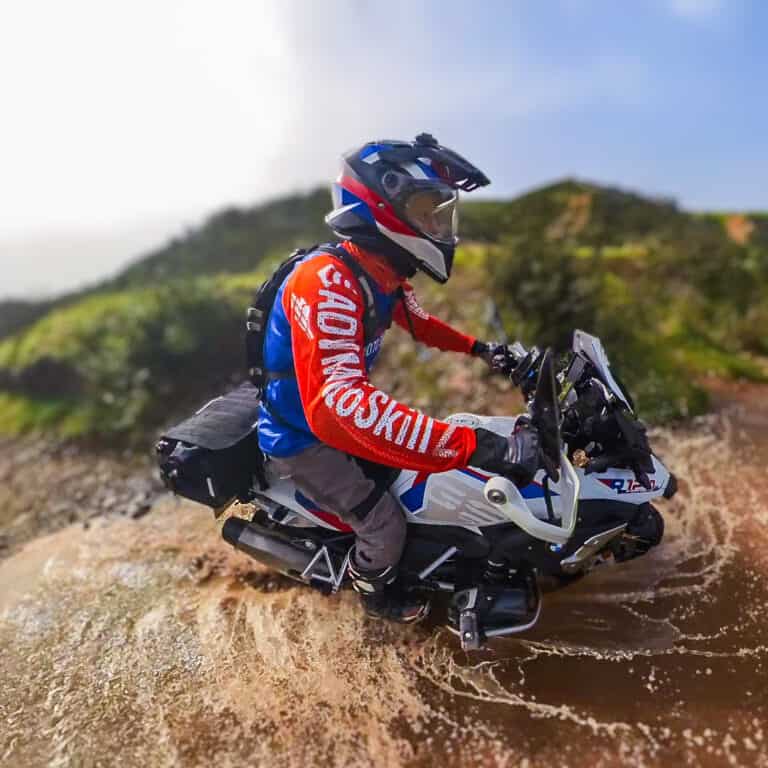
Water crossings are a great time to have your feet firmly planted on the pegs. Water makes both boots and pegs slippery and there may be unseeable obstacles under the surface that can be jarring when the front tire hits them. Having an arch-on-peg placement will provide added stability and control of the bike.
Technical off-road sections, such as loose gravel, large rocks, and narrow single-track that require quick braking with the rear wheel are also best tackled with the front to mid portion of the arch peg placement (depending on foot size).
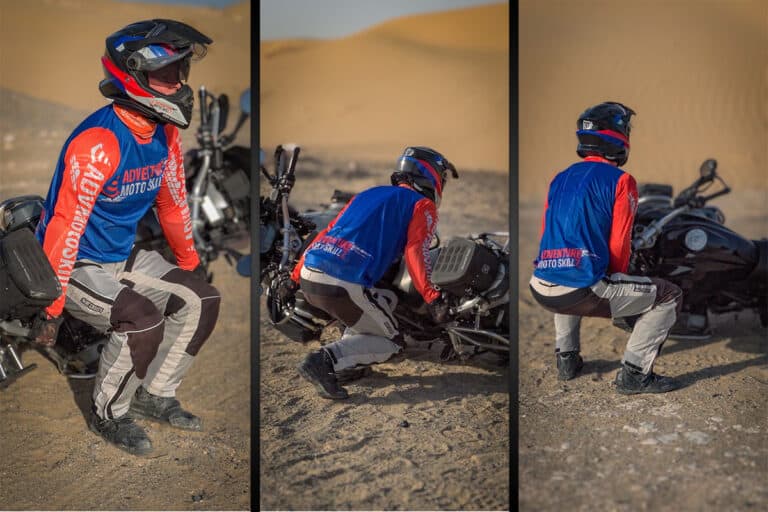
Riding over loose sand is easier when allowing the heels to drop down below the footpeg. This helps you to move your hips further to the rear of the bike to get more traction to the rear tire. Having the foot a bit more forward on the pegs allows you to shift maximum body weight rearward over that back tire.
What to wear on your feet when riding an adventure motorcycle
The first piece of kit for your feet is socks. Look for socks that provide comfort, and flexibility and are long-lasting. Purpose-made motorcycle socks come with mesh panels and are ventilated to keep feet dry. Depending on the environment you ride, this moisture-wicking fabric will help remove excess sweat from the feet, reducing the potential of blisters and increasing comfort. If you wear knee pads, then above-calf height socks can add comfort. Educate yourself on the options here and choose the features that best meet your needs.
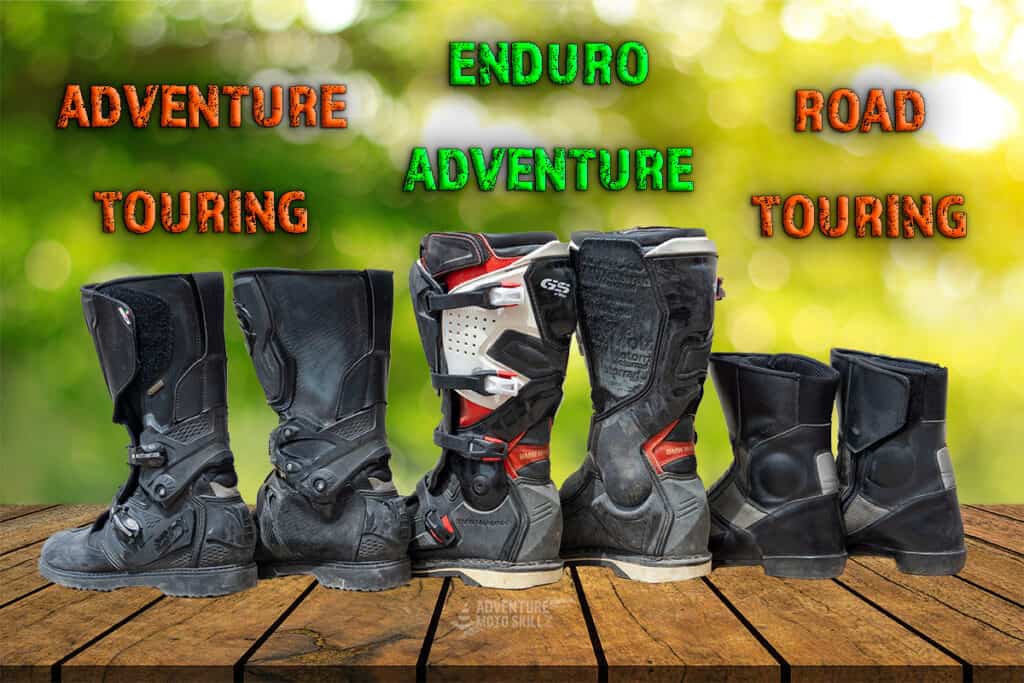
Adventure motorcycle boots are an investment that will pay dividends out on the trails. Find a boot that provides protection, flexibility, and appropriate weatherproofing for your riding climate. No matter your climate, a good all-weather boot will serve you well off-road for sand, gravel, dirt, and water.
My Top pick for adventure off-road riding boots are the SIDI Adventure 2 Gore-Tex Boots.
Features include:
- Gore-Tex highly breathable and waterproof membrane
- Single Flex System upper no longer squeaks when you walk
- Tongue-in-groove rear of calf panels protect the Achilles tendon
- Bonded non-slip lug type sole
- Replaceable micro adjustable cam lock buckle system with memory retention straps
- Full Grain Microfiber material is used for the upper’s construction along with Cordura
- Nylon inner sole with removable arch support pad
- Beefy pull tab makes entry and exit a breeze
- Exclusive cam-lock buckle system combined with a VELCRO® brand fastener upper flap with an elastic expansion panel
- Cambrelle lining
- Slim, cool non-bootie design
- Rigid, shock resistant, anatomically shaped heel with hyper extension block for maximum protection
- Split grain leather inner anti-wear/ heat panels are incorporated into the inside of the boot
- A reflective panel is placed above the heel for night riding visibility
You can check out a complete description or purchase these SIDI boots here.
If my ride will include excessive rocks and/or water crossings, then the hard enduro-style adventure boots are my next go-to option.
BMW GS Competition Boots feature:
- All seasons
- Breathable lining, covered with foam
- Bootie insert
- Shin guard settings
- 4 ergonomic adjustable buckles, in aluminum and interchangeable
- Safety system offering heel reinforcement
- Safety system providing internal toe protection
- Double flexible control mechanism
- Hybrid sole
- Metal toe piece that helps getting under the shift lever
For on-road commuting and touring, I go with the BMW Flow Boot.
Features include:
- Super light and breathable summer short shank boots
- Mixture of leather and textile
- Shin and ankle protection
- Heel, toe and shift side reinforcements
- Velcro fastener
- Fast drying functional lining (breathable)
- Soft neoprene collar
- Sturdy profiled rubber sole
- Removable anatomical moisture-wicking insole
- Reflective strips above the heel
You can check out a complete description or purchase these SIDI boots here.
For a look at all the gear we use click here, to our GEAR WE USE page.
About the Author
Coach Mike is a Certified Off-Road Motorcycle Instructor & founder of ADVMotoSkillZ.
Riding tips from ADVMotoSkillZ reach thousands of international riders daily through social & blogs.
Click here to learn more about Mike’s motorcycle evolution from a Harley road rider to finding his true passion for off-road riding on a BMW 1200 GS.
If you would like to send Mike a quick message or invite him to provide training at your local facility, then visit the contact page here.