How to Mount an ADV Motorcycle Off-Road
We spend a lot of time learning proper off-road riding techniques, but what about getting on and off the bike in rough terrain? For tall riders with flexible joints, this might be the easiest part of the ride. However, for many, this can be quite a challenge.
Learning how to mount a motorcycle off-road involves mastering situational awareness, motorcycle positioning prep, and proper rider body posture. Beyond these foundational skills, one must also understand how to modify the techniques in less-than-ideal situations.
This process may seem simple, but it’s often overlooked in the rush of hitting the open road. Whether you’re new to riding or have been riding bikes for years, understanding how to mount a motorcycle properly can improve your overall biking experience.
This post may contain Affiliate Links. Please see our Privacy & Disclosure Policy for more details.
Mounting a motorcycle is more than just swinging your leg over the seat. It’s a skill that can impact safety, control, and overall performance on various terrains. This underlines why it’s crucial to get familiar with different mounting methods like normal mounting, peg mounting method, or opposite side mounting techniques early in your riding career.
Regardless of mount choice be aware of your environment:
Your journey begins even before you start riding.
Be mindful of your surroundings and identify any hazards.
If the ground is too unstable or your exit is blocked, you may need to reposition the bike before mounting.
Innovative Motorcycle Tool Sets – Compact & Reliable
Used and recommended by ADVMotoSkillZ
Step-by-Step: How to Mount a Motorcycle Safely
Let’s break down some step-by-step instructions for mounting your bike correctly and how to avoid common pitfalls.
Peg Mounting Method: An Off-Road Preference for Big Bikes

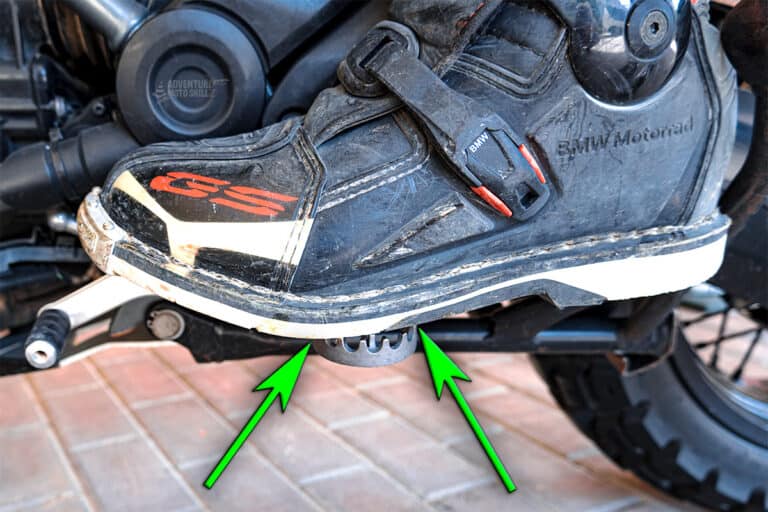
In off-roading scenarios with larger motorcycles, many riders prefer using the peg mounting method. This technique involves positioning your left foot onto the left footpeg and then swinging your right leg over the seat.
This step-up approach allows easier access up into the saddle, making it particularly effective when dealing with taller bikes.
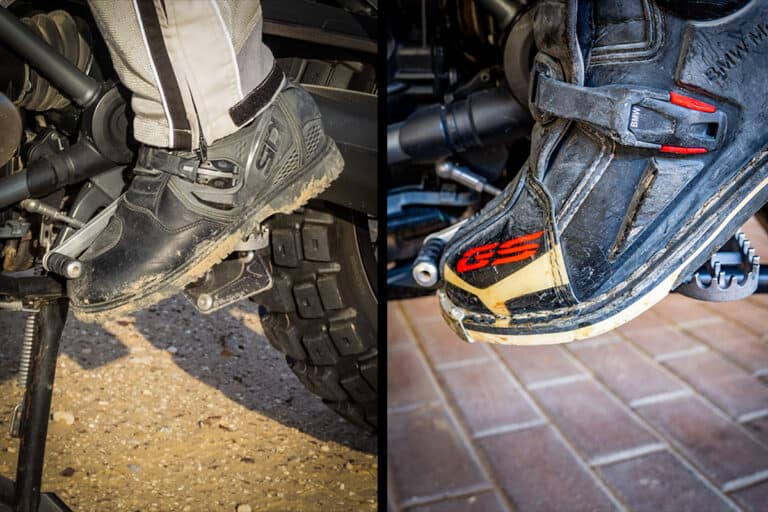
Foot Peg Mount from the Left Side with Side Stand Down
This is my go-to mount when the terrain gets challenging. Here’s how it’s done:
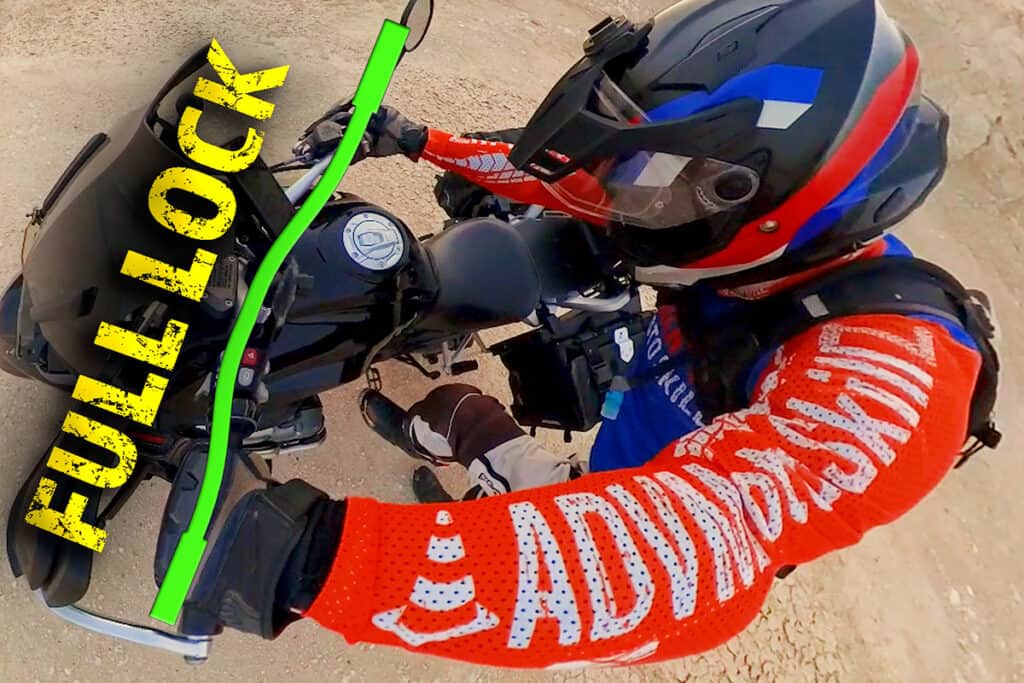
- Turn the handlebars to a full lock to the right.
- Pull in the front brake lever to ensure the motorcycle does not roll during the mount
- Step onto the left foot peg with your left foot
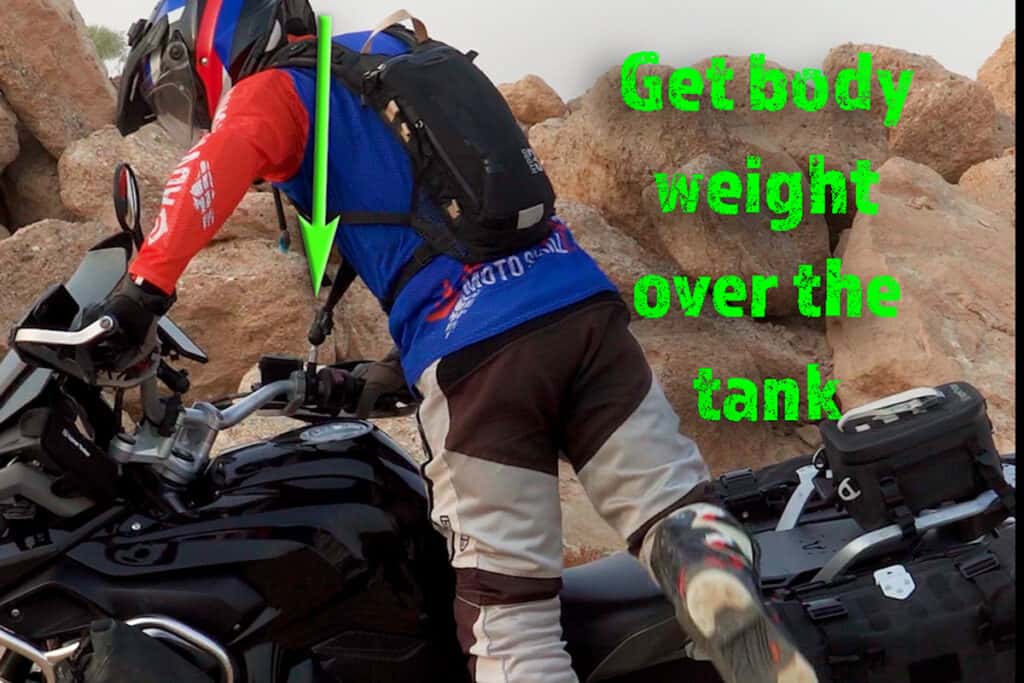
- Lean forward from the hips (like a hinge), getting your chest over the bike’s center line
- Swiftly swing your right leg over to the right foot peg
After mounting, utilize the handlebar leverage to lift it up off the side stand. Avoid using upper body strength alone to lift the bike. Instead, place your left foot on the ground, pivot on the ball of your foot, and push your knee into the bike’s side, making the process smoother.
Before you hit the trail, ensure the side stand is up.
Mounting the Motorcycle Without the Side Stand (Step Through Method)
Sometimes the situation demands an agile mount without relying on the side stand. For instance, when you’re on a hill, and the bike leans toward the downhill side, a traditional mount might seem risky. Instead:
- Choose to mount the bike from the higher side for an advantage
- Grab ahold of the handlebar closest to you with the same side hand
- Lift your opposite side leg and step through over the seat
- Place your foot on the outside foot peg.
NOTE: Always ensure at least one foot is securely on the ground.

Top-quality gear for your next adventure
Used and recommended by ADVMotoSkillZ
Right Side Foot Peg Mount with Side Stand Down
Mounting from the right side requires extra attention to avoid tipping the bike:
- Turn the handlebars to a full lock to the left
- Pull in the front brake lever to ensure the motorcycle does not roll during the mount
- Step onto the right foot peg with your right foot **USE CAUTION to not tip the bike towards you and off the side stand**
- Quickly hinge forward from the hips, getting your chest over the bike’s center line to provide the needed counterbalance
- Swiftly swing your left leg over to the left foot peg
When you are ready to pull away, place your right foot on the ground so that you can lift the side stand up with your left foot.
TIP: Become comfortable only having one foot on the ground at a time. Depending on rider height & terrain, it’s not always possible to get both feet on the ground. Be sure that one foot is planted securely like an anchor.
The Traditional Left Side Motorcycle Mount
The age-old method, but with some added tips:
- Keep the handlebars at a full lock to the right.
- Step left foot close to the bike
- Pull in the front brake and position your left foot close to the bike.
- Lean forward over the centerline of the bike, while lifting your right leg up and over.
- Place right foot on the right foot peg.
Remember, a good habit is to always have one foot secure on the ground.
When you are ready to pull away, place your right foot on the ground so that you can lift the side stand up with your left foot.
BONUS TIPS: Motorcycle Dismounting Techniques
Dismounting your bike can be a tad tricky on challenging terrains as well. Let’s review a few strategies:
Foot Peg Dismount to the Left
- Bike at a stop and left foot on the ground (because you have your right foot on the rear brake)
- Turn the handlebars to full lock to the right
- Pull in the front brake lever
- Quickly place your right foot on the ground so that you can extend the side stand down your left foot
- Once the bike is secure on the side stand, stand upright on both foot pegs.
- Lean forward at the waist
- Swing right leg back and over the seat.
- Pivot on the ball of your left foot as the right leg comes up and over the saddle.
- Place right foot on the ground and then step off foot peg with the left foot.
Foot Peg Dismount to the Right
- Ensure the side stand is deployed and is secure on the ground before dismounting
- Turn the handlebars to full lock to the left
- Pull in the front brake lever
- Stand up on both foot pegs
- Lean forward at the waist
- Swing left leg movement back and over the seat
- Pivot on the ball of your right foot as the left leg comes up and over the saddle
- Place the left foot on the ground and then step off the right foot peg
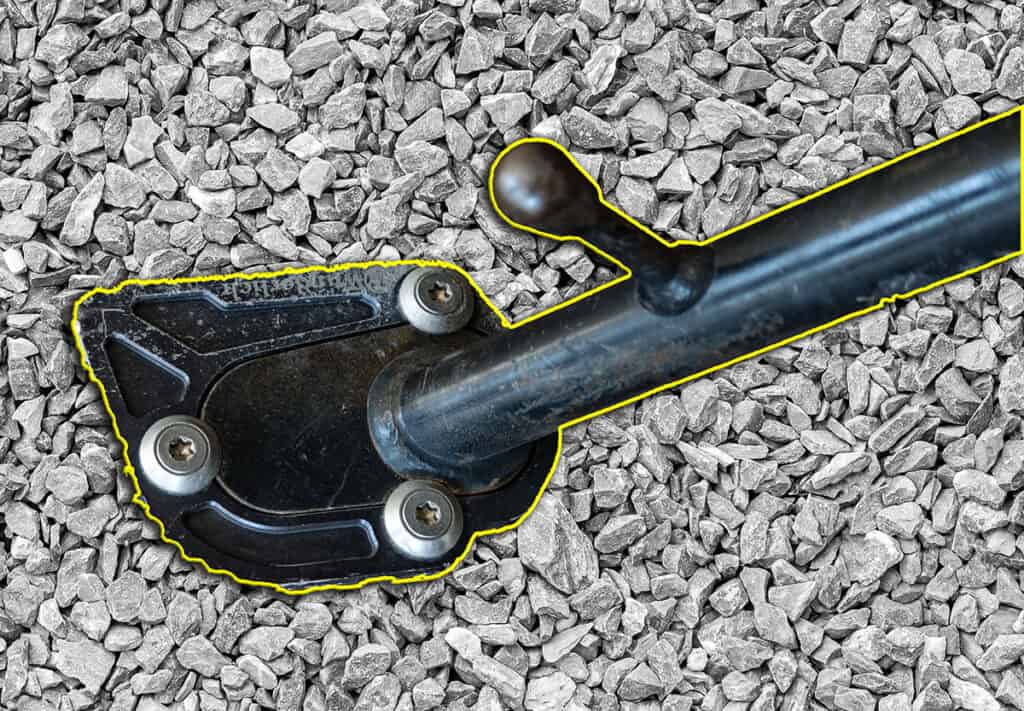
Side Stand Modification for Off-Road Motorcycles
If you ride frequently on soft terrains like sand or gravel, a side stand extender can be a game-changer. By increasing the surface area of the stand plate, you gain better stability, reducing the chances of your bike tipping over.
Mounting and dismounting your bike isn’t just about style; it’s about safety, comfort, and preparedness. No matter the terrain or situation, practicing these techniques ensures you’re ready for whatever the road throws your way. And remember, each rider is unique, so find what’s comfortable for you and make it your own. Safe riding!
Common Mistakes While Mounting Motorcycles
The art of mounting a motorcycle is often overlooked by riders, both novice and experienced. This seemingly simple task can be riddled with common mistakes that could potentially lead to accidents or damage to the bike.
Let’s explore some common mistakes made while mounting a motorcycle, and how to prevent them for safer riding.
Failing to Stabilize The Bike Before Mounting
This one is incredibly common (maybe it’s even happened to you). Be sure to look down at the side stand to ensure that it is fully locked in its proper extended position. It may seem trivial, but failing to do this allows the incorrectly deployed side stand to fold up as you mount. The result is typically a tip over.
Inappropriate Body Position During Mounting Process
Body positioning and weight distribution plays a crucial role in an off-road mount. Failing to get your body weight up over the center line of the bike can lead to tips and wobbles.
Mounting to Quickly for the Terrain (or Your Abilities)
Racing through the steps of mounting without giving due importance to each one of them is another common mistake. Remember, patience is a virtue when it comes to safe and effective boarding of an adventure or dual-sport motorcycle. Always follow the listed steps in order to avoid any mishaps that may occur due to haste or negligence on the part of the rider themselves
Our overall goal is to keep ourselves and our machines unharmed and enjoy the open roads and trails. Let’s avoid worry or unnecessary incidents occurring due to a lack of knowledge and understanding of the fundamental principles involved.
About the Author
Coach Mike is a Certified Off-Road Motorcycle Instructor & founder of ADVMotoSkillZ.
Riding tips from ADVMotoSkillZ reach thousands of international riders daily through social & blogs.
Click here to learn more about Mike’s motorcycle evolution from a Harley road rider to finding his true passion for off-road riding on a BMW 1200 GS.
If you would like to send Mike a quick message or invite him to provide training at your local facility, then visit the contact page here.